Showing posts with label Photo. Show all posts

Monday, March 25, 2013

Newest Addition: Therapy Dog?

     Our newest addition to our family, Dacie, has been an eye opener. She was given to us by a family who turned out to be allergic to her. She is a pure bred Labrador Retriever with an awesome temperament. At just 7 months old, she was very calm, loved everyone and every animal, had a healthy curiosity and was not easily scared. I then realized that she would be a great therapy dog, so my research began.


     As it turned out, she had already been through obedience school, was spayed and up to date on shots. The first requirements were met. However, she cannot be temperament tested until she reaches one year of age. We're now at 9 months and counting. We have made an effort to continue socializing her, taking her to pet friendly stores and to friends' homes to meet new people and animals. So far, she has done amazingly well!

     Our local Love on a Leash group meets monthly at the library for children's reading and also visits schools, The Cancer Center and many other events and locations. If you're interested in more information or want to find a therapy dog group near you, check out this website.


Sunday, February 3, 2013

DIY: Dog Paw Prints


     The cold weather and Pinterest combined has motivated me to try out a winter craft project. I have been wanting to display some dog art, and what better dog art is there than stamping your own pooch's paws?! This can be done many ways, but I tried one of them out today with the help of my lovely husband.

Supplies

Paper plates

Foam brushes

6" x 12" artist panel (cheaper and sturdier than a canvas wrap)

Acrylic paint to use on their paws (easily washes away)

OPTIONAL Paint for a background color (I used a paint sample I already had)


     I first painted on the background color of choice. I wanted something to match the decor, not just plain white. I applied 3 coats, letting it dry for a few minutes in between each coat. After the background had thoroughly dried, I then prepped the acrylic paint I would use on my dogs' paws by brushing out a large amount onto a paper plate. I chose brown to go with the blue background, but black or white would stand out well, also. My husband and I set up a station on the kitchen floor including:

1 Paper plate with the acrylic paint brushed onto it for dipping their paws

Plain paper plates to test on before placing the print on the panel

A bowl with 1 tsp dawn dish soap and warm water to rinse paws

1 Towel to clean/dry paws

     We had 3 dogs that were all very curious about this set up. We had treats ready to give them after they had cooperated. I won't lie, it was a bit tricky to get them to be still. One of the paw prints messed up, but the acrylic paint made it easy to quickly wipe it away and try again. The prints aren't all perfect, but I like that. It's real.

Now, where to hang it?


These muddy paw prints being tracked into the house recently has also made me consider another idea. 

     If you didn't want to use a display such as this one, you could ultimately use a picture frame by placing parchment paper on the floor. Put the paint on your dog's paws, and let them walk on the paper. After cleaning them off and letting the paint dry, you could then cut out the paw prints you like best and place them in a frame. If you try it, let me know how it goes. 

Tuesday, April 3, 2012

Dog Photography


Here are a few shots of my favorite subjects.


Bailey


Allie


Sophie and Oliver


Kylie


 Portia and Pearla


If you would like to have photos taken of your fur baby, please contact me at wheresashley@gmail.com
I would love to work with your pooch!

Monday, March 12, 2012

Ikea Hackers!

I'm very excited to show off our Ikea hack we came up with for our doggies! It's a steal of a deal. You'll know what I'm talking about if you've ever shopped out elevated dog bowls. For only $27, you can make a very modern doggy diner. Ikea offers this table in a variety of colors, too.

Home made dog diner

Project made of:

Ikea Lack side table, white     $7
2 small stainless steel bowls   $10
1 large stainless steel bowl     $10

Grand Total                         $27


My husband simply used a dremel to cut out the holes to set the bowls into.  It may be smart to line the inside edges with foam to keep water from seeping into the table.  I haven't dont that, yet.  I also need to saw the legs down at least an inch or two, so their heads can be even with their shoulders when they eat.

The purposes of elevated bowls are two-fold.  1) The dog ingests less air, so they don't get as bloated.  This was Maeby's problem before the elevated dog bowls.  She would regurgitate her dog food frequently after eating.  2) It takes less stress off of the dogs joints.  Would you like to stay standing in a squat the whole time you eat?  I wouldn't!  This was to help Kingsley, who is predisposed to joint problems.  I highly recommend it for your doggy.  Dog diners come as short as 3" and as tall as 18."  If you would need a shorter version, Ikea also has a Lack rectangular shelf that would work perfectly!  I've actually seen people mount them to the wall at whatever height is appropriate for their dog and cut the holes in it for their dog's bowls.  It's very doggy chic when done that way, however you would have less color options.


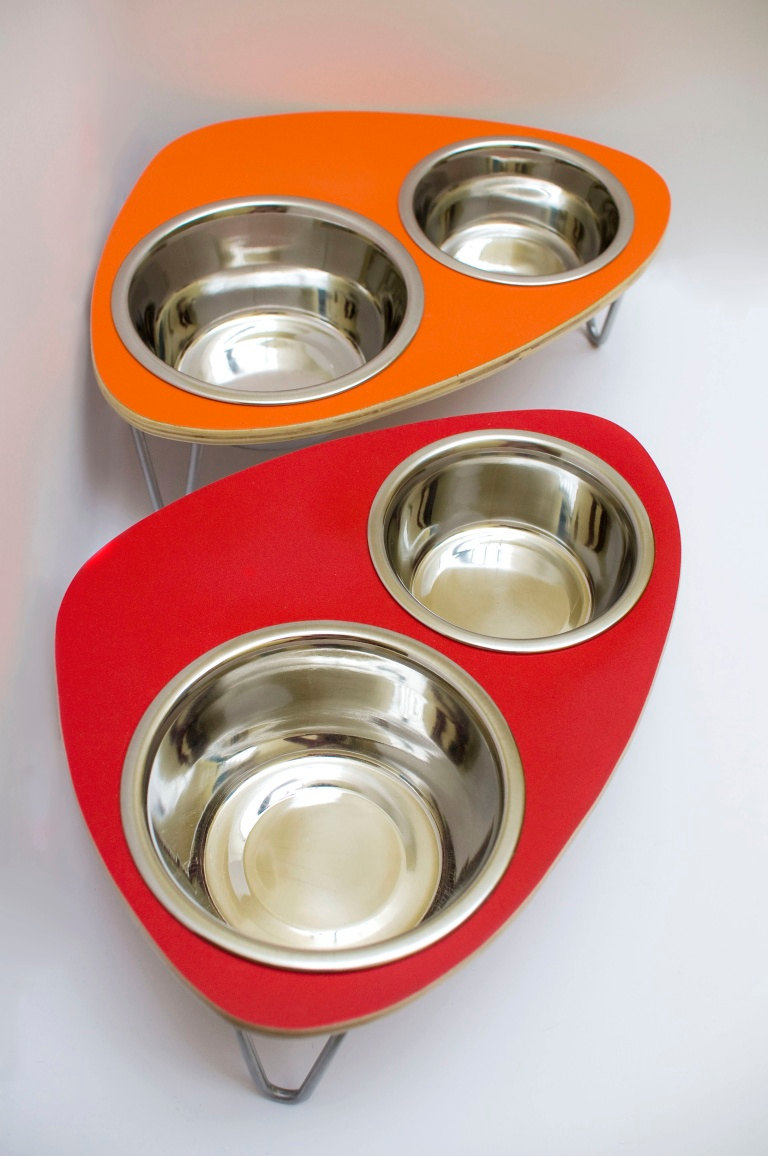
I have seen some very good deals for dog diners that you don't have to build yourself.  I have to share a favorite of mine I found on Etsy.  How cute are these?!  Sold by ModPet, they are very unique!  If I had the space for multiple doggy diners, one for each of my dogs, I would do it!  They are only $38 - $48 depending on size.  ModPet also makes some very modern chic dog furniture.  You'll have to check them out!

There are plenty of other awesome doggy diners out there.  I just wanted to show off ours, really.  =)  I hope you check them out for your dog.