Monday, April 1, 2013

Travel

     With spring break and summer approaching, most of us are planning to get out of town, and some of us will be taking our dogs. More and more awareness is being made of travel safety for our pets. For example, as much as they love to hang their heads out of the window, serious harm could come to them by a passing car tire throwing a rock, or a bug hitting their eye at relatively low speeds. Pets can be a distraction to the driver and be a danger to other passengers if an auto accident occurs. Now there are many affordable options for pet safety gear in the car.

     Brands like Kurgo make great travel gear for dogs that not only protects your dog, but protects your vehicle. The harness that buckles into a safety belt buckle is great, because it allows the dog to still see out the window with the wind in its face but prevents their head from the leaving the car. It also helps provide stability for the dog on curvy roads or stop and go traffic. I also like the hammocks or back seat barrier, because it prevents the dog from getting into your space and distracting you from driving. These companies even provide travel aids for aging dogs that may have joint problems, such as stairs to assist them into the car and padded beds. Click on the links above for online product pricing and inspiration. Also, check out ASPCA and BARK for more travel tips.

     You may also be considering traveling by plane with your pet. More airlines are becoming more pet friendly, but there are still concerns. Small pets, under 20lbs, can travel in the main cabin with you. Larger pets are stowed away as cargo. If your pet is going to be packed with the cargo, please read these tips from the FAA to ensure your pet has a safe flight and consult your vet regarding health concerns. There are specific airlines just for shipping pets that are more accommodating. However, these airlines charge high prices, and you cannot accompany your pet.


    For area specific pet travel tips and recommendations, see these helpful links:


     Happy Travels!

Monday, March 25, 2013

Newest Addition: Therapy Dog?

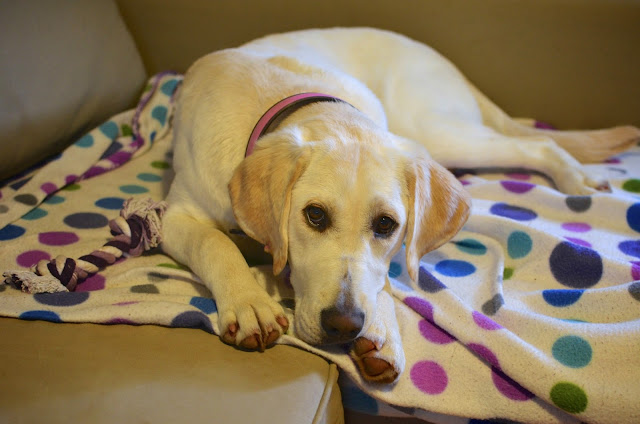
     Our newest addition to our family, Dacie, has been an eye opener. She was given to us by a family who turned out to be allergic to her. She is a pure bred Labrador Retriever with an awesome temperament. At just 7 months old, she was very calm, loved everyone and every animal, had a healthy curiosity and was not easily scared. I then realized that she would be a great therapy dog, so my research began.


     As it turned out, she had already been through obedience school, was spayed and up to date on shots. The first requirements were met. However, she cannot be temperament tested until she reaches one year of age. We're now at 9 months and counting. We have made an effort to continue socializing her, taking her to pet friendly stores and to friends' homes to meet new people and animals. So far, she has done amazingly well!

     Our local Love on a Leash group meets monthly at the library for children's reading and also visits schools, The Cancer Center and many other events and locations. If you're interested in more information or want to find a therapy dog group near you, check out this website.


Sunday, February 3, 2013

DIY: Dog Paw Prints


     The cold weather and Pinterest combined has motivated me to try out a winter craft project. I have been wanting to display some dog art, and what better dog art is there than stamping your own pooch's paws?! This can be done many ways, but I tried one of them out today with the help of my lovely husband.

Supplies

Paper plates

Foam brushes

6" x 12" artist panel (cheaper and sturdier than a canvas wrap)

Acrylic paint to use on their paws (easily washes away)

OPTIONAL Paint for a background color (I used a paint sample I already had)


     I first painted on the background color of choice. I wanted something to match the decor, not just plain white. I applied 3 coats, letting it dry for a few minutes in between each coat. After the background had thoroughly dried, I then prepped the acrylic paint I would use on my dogs' paws by brushing out a large amount onto a paper plate. I chose brown to go with the blue background, but black or white would stand out well, also. My husband and I set up a station on the kitchen floor including:

1 Paper plate with the acrylic paint brushed onto it for dipping their paws

Plain paper plates to test on before placing the print on the panel

A bowl with 1 tsp dawn dish soap and warm water to rinse paws

1 Towel to clean/dry paws

     We had 3 dogs that were all very curious about this set up. We had treats ready to give them after they had cooperated. I won't lie, it was a bit tricky to get them to be still. One of the paw prints messed up, but the acrylic paint made it easy to quickly wipe it away and try again. The prints aren't all perfect, but I like that. It's real.

Now, where to hang it?


These muddy paw prints being tracked into the house recently has also made me consider another idea. 

     If you didn't want to use a display such as this one, you could ultimately use a picture frame by placing parchment paper on the floor. Put the paint on your dog's paws, and let them walk on the paper. After cleaning them off and letting the paint dry, you could then cut out the paw prints you like best and place them in a frame. If you try it, let me know how it goes. 

Tuesday, January 29, 2013

Baked Glazed Apple Treats - Limited Ingredients


     We recently acquired a third dog, fostering, and the amount of treats we're going through is crazy! I only purchase treats and food that are wheat and corn free due to Maeby's food allergies, which can get pricey, so I decided to make some treats again. I wanted to do something more simple and less messy than the usual process. I then thought of apples; my dogs love apples! They're relatively cheap and very healthy. So, this is the concoction that resulted:

Baked Glazed Apple Treats

Ingredients:
3 Apples, of any variety
3 TBSP honey
1/2 tsp Cinnamon


Preheat the oven to 275.
Clean and dry the apples (leaving the skins on provides extra fiber). Chop off the tops and bottoms, since they will be too thick for the desired result. Slice the apples horizontally as thin as possible, approximately 12 slices per apple, removing seeds.


Place the apple slices on cookie sheets lined with wax or parchment paper. HINT: Spray the cookie sheets with oil before applying wax paper, as the honey will cause the paper to stick to the pan. 

Combine the honey and cinnamon in a small bowl and microwave x 30 seconds. Now, spoon or brush small amounts onto each apple. If the honey starts to become too thick to spread, reheat in the microwave at 10 second increments. 


Place the cookie sheets in the oven for 2 hours, flipping the apples every 30 minutes.
Apples should be crispy around the edges and dehydrated. Let cool before serving. 
Store in airtight container and refrigerate.